How to Create Stunning 3D Minecraft Animations: A Beginner’s Guide – Ever dreamed of bringing your Minecraft creations to life with dynamic 3D animations? You’re not alone! This guide will walk you through the exciting world of Minecraft animation, from the basics of 3D software to advanced techniques that will transform your Minecraft world into a captivating cinematic experience.
We’ll explore the essential tools and resources you need, covering everything from popular animation software like Blender and Cinema 4D to useful plugins and mods that enhance your animation capabilities. We’ll then dive into the art of building stunning 3D models, mastering animation techniques, and adding visual effects that will make your animations truly stand out.
Get ready to learn about keyframing, motion capture, shaders, and more, as we unlock the secrets to creating professional-looking Minecraft animations.
Understanding 3D Animation in Minecraft
Minecraft, with its blocky aesthetic and open-world environment, presents a unique canvas for 3D animation. While it might seem different from traditional animation, the fundamental principles remain the same, with a few twists specific to Minecraft’s blocky world.
The Role of 3D Animation Software
D animation software plays a crucial role in creating Minecraft animations. These tools provide the necessary functionalities to manipulate objects, create movement, and bring your ideas to life. Popular choices for Minecraft animation include Blender, Cinema 4D, and even specialized Minecraft animation plugins like Mine-imator.
These programs offer a range of features, including:
- Modeling:Building and shaping the characters, objects, and environments that will populate your animation.
- Rigging:Creating a virtual skeleton that allows you to control the movement of characters and objects.
- Animation:Setting keyframes, defining movement paths, and manipulating objects over time.
- Rendering:Generating the final images or video from the animated scenes.
Popular Animation Techniques
Minecraft animation leverages various techniques to bring dynamic visuals to life. These techniques are applied in diverse ways to create unique animation styles.
- Keyframing:This is the most common technique, where you define specific poses or positions at different points in time. The software interpolates the movement between these keyframes, creating a smooth animation. Keyframing is particularly effective for creating character movements, object interactions, and camera movements.
- Motion Capture:This technique involves capturing real-life movements and translating them into animation. Motion capture can be used to create realistic character movements, especially for complex actions like walking, running, or fighting. While motion capture software is typically used for professional animation, some dedicated Minecraft animation tools offer rudimentary motion capture functionalities.
- Procedural Animation:This technique utilizes algorithms and rules to automatically generate animation. Procedural animation can be used to create realistic effects like fire, water, or even complex character behaviors. Minecraft’s blocky nature makes procedural animation particularly interesting, as it can be used to create unique and unexpected visual effects.
Essential Tools and Resources
Creating stunning 3D Minecraft animations requires the right tools and resources. This section will guide you through the best software options, the importance of plugins and mods, and valuable online resources that will empower you to elevate your Minecraft animation game.
Software Options for 3D Minecraft Animation
The first step in creating Minecraft animations is choosing the right software. There are many options available, both free and paid, each with its unique features and benefits.
Free Software
- Minecraft:While Minecraft itself is not specifically designed for 3D animation, it can be used to create simple animations using the game’s built-in features. You can use the game’s built-in recording features to capture gameplay and then edit the footage in a video editing program like Adobe Premiere Pro or DaVinci Resolve.
- Blender:A free and open-source 3D animation software that is popular among professionals and hobbyists alike. Blender is a powerful tool that offers a wide range of features, including modeling, rigging, animation, and rendering. It can be used to create high-quality 3D animations for Minecraft, but it requires a steep learning curve.
- HitFilm Express:A free video editing software that includes some basic 3D animation features. While not as powerful as Blender, HitFilm Express is a good option for beginners who want to experiment with 3D animation without spending money.
Paid Software
- Adobe After Effects:A professional-grade motion graphics and animation software that offers a wide range of features and tools. After Effects is a powerful tool for creating complex 3D animations, but it comes with a monthly subscription fee.
- Cinema 4D:A popular 3D animation software known for its user-friendly interface and powerful features. Cinema 4D is a good option for both beginners and experienced animators, and it offers a wide range of plugins and extensions.
- Maya:Another professional-grade 3D animation software that is widely used in the film and gaming industries. Maya is a powerful tool with a steep learning curve, but it offers a wide range of features and tools for creating complex 3D animations.
Plugins and Mods for Enhanced Animation
Plugins and mods are essential for expanding Minecraft’s animation capabilities. They can add new features, streamline workflows, and make the animation process smoother.
Popular Plugins and Mods
- WorldEdit:A powerful plugin that allows you to modify the Minecraft world quickly and easily. WorldEdit can be used to create complex terrain, structures, and other elements that can be used in your animations.
- VoxelSniper:A mod that adds a variety of tools for sculpting and manipulating blocks in Minecraft. VoxelSniper can be used to create detailed models and animations that would be difficult or impossible to create using the game’s built-in tools.
- Optifine:A mod that improves Minecraft’s performance and graphics. Optifine can help you create smoother animations and increase the frame rate of your recordings.
- Animation API:A mod that allows you to create custom animations using Java code. This mod is for advanced users who are comfortable with programming.
Online Resources and Communities
The Minecraft animation community is a vibrant and supportive one. There are many online resources available to help you learn, share, and collaborate.
Valuable Online Resources
- Minecraft Forums:A great place to find tutorials, tips, and advice from other Minecraft animators.
- YouTube:A wealth of tutorials and inspiration for Minecraft animation. Search for channels like “The Pixel Animator” and “Minecraft Animations” for great content.
- Reddit:A platform for sharing and discussing Minecraft animations. Join the r/Minecraft subreddit to connect with other animators.
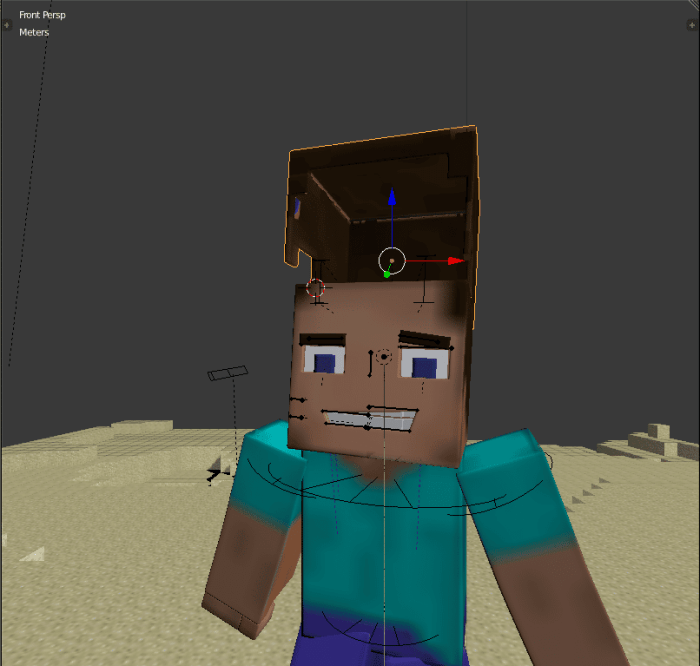
Building Stunning 3D Models
The heart of any captivating Minecraft animation lies in the 3D models you create. These models can range from simple blocks to intricate structures, and the key to crafting stunning visuals is understanding how to optimize them for animation. This section will guide you through the process of building impressive 3D models in Minecraft, emphasizing the importance of texture mapping, lighting, and material properties for achieving visually appealing results.
Building Intricate 3D Models
Creating detailed 3D models in Minecraft requires a methodical approach. The process involves meticulous planning, efficient resource utilization, and a keen eye for detail. Here’s a step-by-step guide to building intricate 3D models:
- Conceptualization and Planning:Start by visualizing the model you want to create. Sketch out the design, considering its dimensions, proportions, and any intricate details. This planning phase ensures a clear roadmap for your model’s construction.
- Resource Selection:Choose the appropriate blocks and materials for your model. Consider the visual style you’re aiming for, whether it’s realistic or stylized. For instance, if you’re building a medieval castle, using cobblestone, stone bricks, and wood would be fitting.
For a futuristic spaceship, consider using smooth stone, iron blocks, and glass.
- Construction:Begin building your model, starting with the foundation and gradually adding details. Use the “place” command to efficiently place blocks, and consider using command blocks to automate repetitive tasks. For example, you can create a command block that automatically places blocks in a specific pattern, saving time and effort.
- Optimization:Once the model is built, optimize its structure for animation. This involves minimizing the number of blocks used while maintaining the model’s visual integrity. You can achieve this by using smaller blocks for intricate details, and utilizing empty spaces for movement and animation.
Texture Mapping
Texture mapping is crucial for adding visual depth and realism to your 3D models. By applying textures to the surfaces of your models, you can create a sense of detail and variation, making them more visually appealing. Here’s why texture mapping is essential:
- Enhanced Visual Detail:Textures add intricate details to your models, such as wood grain, brick patterns, or metal scratches. These details contribute to a more realistic and visually engaging experience.
- Increased Realism:Texture mapping allows you to simulate different materials, like wood, stone, metal, or fabric, making your models appear more authentic. This is especially important for creating objects that are meant to be recognizable, such as furniture, tools, or vehicles.
- Improved Animation:Texture mapping can enhance the movement of your models by adding visual cues that highlight the changing angles and perspectives. For example, a textured surface will show more detail as it rotates, adding a dynamic element to the animation.
Lighting and Material Properties
Lighting and material properties play a crucial role in enhancing the visual appeal of your 3D models. By manipulating light sources and adjusting the materials used, you can create a wide range of visual effects, from subtle nuances to dramatic contrasts.
Here’s how lighting and material properties impact your models:
- Realistic Lighting:Proper lighting creates a sense of depth and realism by casting shadows and highlights on your models. You can use various light sources, such as torches, lanterns, or glowstone, to create different lighting effects.
- Material Properties:The properties of materials, such as their reflectivity, transparency, and texture, significantly affect how light interacts with them. For example, a shiny metal surface will reflect light differently than a rough stone surface. Experimenting with different materials can create visually striking effects.
- Mood and Atmosphere:Lighting and material properties can also be used to set the mood and atmosphere of your animations. Soft, warm lighting can create a cozy and inviting feel, while harsh, contrasting lighting can create a dramatic and intense atmosphere.
Creating Realistic and Stylized Models
The choice between creating realistic or stylized models depends on the theme and style of your animation.
- Realistic Models:Realistic models aim to accurately depict real-world objects, focusing on details and textures that mimic their physical counterparts. For example, a realistic medieval castle would feature detailed stonework, wooden beams, and realistic textures for the surrounding environment.
- Stylized Models:Stylized models prioritize artistic expression and visual appeal over strict realism. They often feature exaggerated proportions, bold colors, and unique textures. For instance, a stylized robot might have exaggerated features, metallic textures, and glowing lights for a futuristic and visually striking look.
Mastering Animation Techniques
Bringing your Minecraft creations to life requires mastering animation techniques. This section delves into the core principles of animation in Minecraft, exploring keyframing, advanced techniques, and various animation styles.
Keyframing and Timing
Keyframing is the foundation of animation in Minecraft. It involves setting specific poses or positions for your model at different points in time. These points are called keyframes, and they define the movement of your animation. Timing refers to the duration between keyframes, which determines the speed and rhythm of your animation.
- Understanding Keyframes: Keyframes are like snapshots of your model’s position, rotation, or other properties at specific points in time. By adjusting the position or rotation of your model between keyframes, you create the illusion of movement.
- Timing and Easing: Timing is crucial for creating natural and engaging animations. By adjusting the timing between keyframes, you can control the speed and smoothness of your animation. Easing is a technique that smooths out the transition between keyframes, making the movement appear more natural.
Advanced Animation Techniques
Beyond basic keyframing, Minecraft animation software offers advanced techniques to enhance your animations:
- Motion Capture: This technique involves capturing real-world movements and translating them into animation data. Motion capture can be used to create realistic animations for characters, such as walking, running, and fighting. For example, a Minecraft player could use motion capture to create an animation of a character swinging a sword.
- Inverse Kinematics (IK): IK allows you to manipulate the end of a chain of limbs (like a hand or foot) and have the software automatically adjust the positions of the joints in between. This simplifies the process of animating complex movements, particularly for characters with articulated limbs.
- Procedural Animation: This technique uses algorithms and rules to automatically generate animation sequences. Procedural animation is often used for repetitive or complex movements, such as swaying trees or flowing water.
Animation Styles
Different animation styles can be used to achieve specific effects and convey different moods.
- Walk Cycles: A walk cycle is a series of keyframes that depict the natural movement of a character’s legs while walking. Smooth transitions and proper timing are essential for creating a convincing walk cycle.
- Jump Animations: Jump animations involve capturing the upward arc of a character’s jump, followed by a controlled landing. These animations require careful timing and easing to create a realistic and satisfying jump.
- Combat Sequences: Combat animations involve dynamic movements, such as striking, blocking, and dodging. These animations require careful planning and execution to create visually engaging and exciting combat sequences.
Adding Visual Effects and Enhancements

Minecraft animations, while captivating in their blocky charm, can be elevated to a whole new level of visual appeal with the strategic use of effects and enhancements. Imagine your creations bathed in ethereal light, particles swirling around them, or the scene transformed with cinematic post-processing.
These are not just aesthetic flourishes; they are powerful tools that can amplify the story, mood, and impact of your animations.
Shaders
Shaders are programs that modify how Minecraft’s world is rendered, adding depth, realism, and a range of visual styles. They work by manipulating the way light and shadows interact with blocks, creating stunning effects that can make your animations feel more immersive and cinematic.
Here are some ways shaders can enhance your Minecraft animations:
- Enhanced Lighting:Shaders can create realistic lighting effects, casting shadows and reflections that bring your creations to life. This can be especially impactful in scenes with complex lighting setups or intricate details.
- Atmospheric Effects:Shaders can simulate fog, rain, snow, and other atmospheric conditions, adding depth and realism to your animations. This can create a sense of place and enhance the mood of your scenes.
- Color Grading:Shaders can adjust the overall color palette of your animations, creating different moods and atmospheres. You can use them to create warm and inviting scenes or cool and dramatic ones.
- Bloom and Glow:Shaders can add a soft glow or bloom to certain objects, making them stand out and adding a touch of magic. This is great for highlighting important elements or creating a sense of wonder.
Particle Effects
Particle effects are visual elements that can add a touch of magic and dynamism to your animations. They can range from simple sparks and dust to complex explosions and swirling clouds. Here’s how particle effects can elevate your animations:
- Adding Atmosphere:Particle effects can create a sense of atmosphere and environment, such as swirling snow in a blizzard or shimmering heat waves in a desert. They can also enhance the feeling of movement and action in your animations.
- Highlighting Key Moments:Particle effects can be used to highlight important moments in your animations, such as explosions, magical spells, or the arrival of a character. This can draw attention to these moments and create a more impactful experience.
- Enhancing Visual Storytelling:Particle effects can be used to tell stories visually, such as a trail of smoke from a dragon’s breath or a shower of sparks from a blacksmith’s forge. They can add a layer of visual storytelling that complements your animation’s narrative.
Post-Processing Techniques
Post-processing techniques are applied to your animation after it has been rendered. These techniques can add final touches that enhance the overall look and feel of your work. Here are some popular post-processing techniques used in Minecraft animations:
- Color Correction:This technique adjusts the color balance and overall tone of your animation, creating a more consistent and visually appealing look.
- Sharpening:Sharpening enhances the edges of your animation, making it appear crisper and more defined. This can be useful for improving the clarity of your animations.
- Depth of Field:This technique blurs the background of your animation, drawing attention to the foreground and creating a more cinematic feel. It can be used to emphasize certain elements or create a sense of distance.
- Vignette:This technique darkens the edges of your animation, drawing the viewer’s attention to the center. It can create a more intimate or focused feel for your animations.
Storytelling and Composition
A captivating Minecraft animation is more than just pretty visuals; it’s about telling a story that resonates with viewers. This is where the art of storytelling and composition comes in. By carefully planning your shots, pacing, and editing, you can create an immersive experience that keeps your audience engaged.
Camera Angles and Framing Techniques
Camera angles and framing play a crucial role in shaping the narrative of your animation. They can influence the mood, perspective, and impact of your scenes. Here are some techniques to enhance the storytelling power of your Minecraft animations:
- Establishing Shots:Start with wide shots to set the scene and introduce the environment. This helps viewers understand the context and scale of your animation. For instance, a wide shot of a bustling city can set the stage for a thrilling adventure.
- Medium Shots:These shots focus on characters or objects, providing a more intimate view. They allow viewers to connect with the action and emotions of the scene. A medium shot of a character gazing at a distant horizon can evoke a sense of wonder and anticipation.
- Close-Ups:Close-ups emphasize details and emotions, drawing the viewer’s attention to specific elements. A close-up on a character’s face can reveal their feelings and reactions, adding depth and emotional resonance to the narrative.
- High Angles:These shots offer a bird’s-eye view, creating a sense of power or dominance. They can be used to showcase the vastness of a landscape or emphasize the vulnerability of a character. Imagine a high-angle shot overlooking a sprawling forest, revealing a hidden pathway that leads to a mysterious destination.
- Low Angles:Low angles create a sense of grandeur or intimidation. They can make characters appear larger than life, emphasizing their strength or power. A low-angle shot of a towering castle can create a sense of awe and wonder, highlighting its imposing presence.
- Dutch Angles:These tilted shots create a sense of unease or disorientation. They can be used to emphasize a character’s internal conflict or to heighten the tension of a scene. Imagine a Dutch angle shot of a character walking through a dark and ominous forest, creating a feeling of unease and suspense.
Sound Design and Music
Sound design and music are essential elements for creating an immersive and engaging viewing experience. They can enhance the emotional impact of your animation and draw viewers deeper into the story.
- Ambient Sounds:Ambient sounds, like the rustling of leaves or the chirping of birds, create a sense of realism and atmosphere. They help viewers feel like they are truly present in the world of your animation. Imagine a scene set in a tranquil forest, with the sounds of birds singing and leaves rustling in the breeze, creating a sense of serenity and peace.
- Sound Effects:Sound effects, such as explosions, footsteps, and weapon impacts, add realism and excitement to your animation. They help viewers understand the action and create a visceral connection to the events on screen. Imagine a scene where a character jumps from a cliff, with the sound of wind rushing past their ears and the impact of their landing echoing through the air.
- Music:Music sets the tone and mood of your animation. It can create suspense, evoke emotions, and guide the viewer’s attention. Imagine a dramatic scene where the music swells with tension as a character faces a perilous challenge, building anticipation and excitement.
Rendering and Exporting Your Animation
You’ve poured your heart and soul into creating a stunning 3D Minecraft animation, and now it’s time to bring it to life. This stage is all about transforming your animation from a collection of frames into a polished, shareable video.
This process involves rendering, a crucial step that transforms your static frames into a fluid, moving image, and exporting, which allows you to share your creation with the world.
Want to take your Minecraft creations to the next level? Creating stunning 3D animations is all about mastering the tools and techniques, and understanding the artistic principles behind it. Dive deeper into the world of 3D Minecraft Animation and Art to discover how to bring your Minecraft worlds to life with dynamic visuals.
From lighting and camera angles to character design and storytelling, the possibilities are endless for creating truly captivating 3D animations.
Rendering Your Animation
Rendering your animation is like baking a cake. You’ve got all the ingredients (your frames) ready, and now you need to combine them to create a delicious final product (your animation). In the world of Minecraft animation, this process involves converting your individual frames into a video file.
Here are some tips for achieving high-quality rendering:* Choose the Right Renderer:Minecraft offers various rendering options. The default renderer, which is part of the game itself, is a great starting point. However, for more advanced animations, you might want to consider third-party renderers like Chunky, which offer greater control over lighting, shadows, and other visual effects.
Optimize Rendering Settings
Experiment with different settings to find the best balance between quality and rendering time. Higher resolution settings will create a sharper, more detailed animation, but will also take longer to render. Consider using lower resolution settings for previewing and experimenting, and then switching to higher resolution settings for the final render.
Utilize Render Farms
If you’re working with complex animations, consider using a render farm. Render farms are powerful computers designed specifically for rendering large files. They can significantly reduce the time it takes to render your animation, allowing you to get your masterpiece out to the world faster.
Exporting Your Animation
Once your animation is rendered, you need to export it into a format that can be shared with others. Minecraft offers several export options, each suited for different purposes.* Video Formats:For sharing on YouTube, Vimeo, or other video-sharing platforms, exporting your animation as an MP4 or AVI file is recommended.
These formats are widely supported and offer high-quality playback.
GIF Format
GIFs are perfect for sharing on social media platforms like Twitter and Instagram. They are short, looping animations that can capture attention quickly. However, GIFs are limited in size and resolution, so they may not be suitable for complex animations.
Other Formats
Depending on your needs, you might consider exporting your animation in other formats like WebM, FLV, or MOV. Research different formats and their compatibility with different platforms to find the best option for your project.
Preparing Your Animation for Online Platforms
To ensure your animation reaches its full potential online, follow these best practices:* Optimize File Size:Before uploading your animation, compress it to reduce file size without compromising quality. This will help with faster loading times and smoother playback, especially for viewers with slower internet connections.
Add Relevant Metadata
Include a title, description, and relevant s in your video’s metadata. This will help viewers find your animation and understand its content.
Use Engaging Thumbnails
A captivating thumbnail is crucial for attracting viewers. Choose an image that represents your animation’s most exciting moment or a visually appealing scene.
Showcase and Inspiration
The journey to creating stunning 3D Minecraft animations is not just about mastering technical skills but also about drawing inspiration from the vast world of creative possibilities. A curated gallery of captivating animations can spark your imagination, offering insights into diverse styles and techniques.
This section will explore various inspiring 3D Minecraft animations, showcasing their unique aesthetics and approaches. It will delve into different thematic categories, revealing the breadth of creative expression within this medium. You’ll also find links to prominent Minecraft animation communities and channels where you can discover new talent and connect with fellow creators.
Examples of Stunning 3D Minecraft Animations
This section provides a curated collection of 3D Minecraft animations that showcase the diverse styles and techniques employed by talented creators.
- Architectural Animations:These animations focus on showcasing intricate structures and landscapes, often capturing the beauty of detailed builds and intricate designs. One notable example is “The City of Dreams” by [Creator Name], which showcases a sprawling metropolis with towering skyscrapers, bustling markets, and intricate bridges.
The animation utilizes smooth camera movements and lighting effects to highlight the architectural details and create a sense of grandeur.
- Cinematic Animations:These animations aim to tell a story through captivating visuals and cinematic storytelling techniques. A prime example is “The Legend of the Lost City” by [Creator Name], which features a compelling narrative about a group of adventurers searching for a hidden treasure.
The animation employs dramatic camera angles, dynamic action sequences, and immersive sound design to create an engaging cinematic experience.
- Comedic Animations:These animations are designed to entertain with humor, often utilizing slapstick, witty dialogue, and quirky characters. One example is “Minecraft Bloopers” by [Creator Name], which features a series of hilarious mishaps and funny situations involving Minecraft characters. The animation utilizes exaggerated movements, humorous sound effects, and witty timing to create a lighthearted and entertaining experience.
Minecraft Animation Communities and Channels, How to Create Stunning 3D Minecraft Animations
Exploring the work of other animators is an invaluable way to gain inspiration and learn new techniques. Several online communities and channels cater specifically to Minecraft animation enthusiasts, offering a platform for sharing, collaboration, and discovery.
- [Community Name]:This online forum provides a vibrant community for Minecraft animators to share their work, discuss techniques, and collaborate on projects. Members can access tutorials, resources, and a supportive network of fellow creators.
- [Channel Name]:This YouTube channel features a curated collection of high-quality 3D Minecraft animations, showcasing the latest trends and innovative techniques. Subscribers can find inspiration from diverse styles and learn from the creators’ insights.
- [Channel Name]:This Twitch channel hosts live streams of Minecraft animation projects, offering viewers a behind-the-scenes look at the creative process. Creators often engage with their audience, answering questions and sharing tips and tricks.
Last Word: How To Create Stunning 3D Minecraft Animations

Creating stunning 3D Minecraft animations is a journey of creativity and technical skill. By mastering the principles of 3D animation, exploring the right tools and resources, and honing your animation techniques, you can bring your Minecraft creations to life in ways you never thought possible.
So, grab your pickaxe, fire up your animation software, and get ready to unleash your inner animator! The world of Minecraft animation awaits, ready to be transformed by your imagination.